Putting Gates: Guide to Perfect Putting Alignment and Consistency
Master your putting stroke with precision training aids that force a repeatable path and square face. Discover how putting gates can transform your short game and lower your scores.
EXPLORE PUTTING GATESWhy Putting Gates? Putting gates provide immediate, unmistakable feedback on stroke path and face alignment. By forcing your putter to travel through a narrow channel without contact, you build the muscle memory needed for a consistent, on-line stroke—the foundation of every great putter.
What Are Putting Gates and How Do They Work?
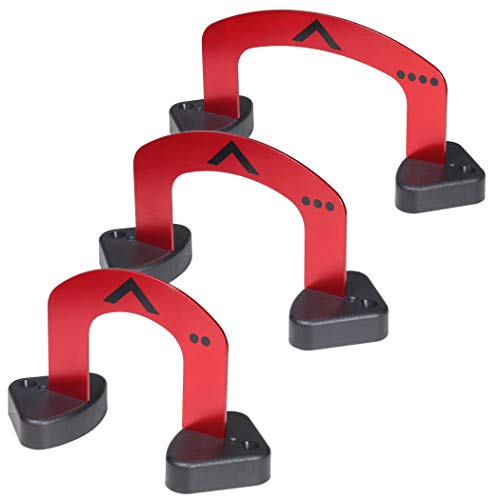
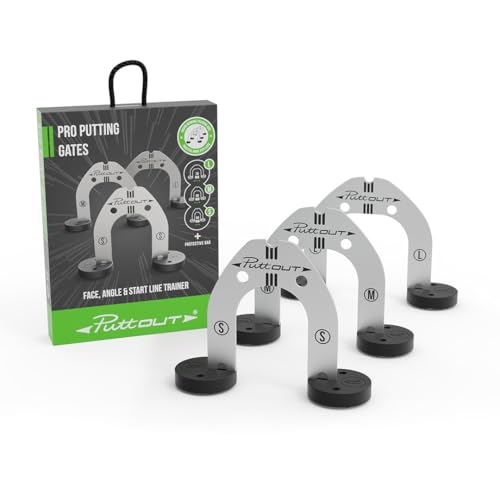
Putting gates are deceptively simple training aids: two parallel obstacles—usually rods, tees, or adjustable markers—placed just wider than your putter head. As you stroke through them, any deviation in path or face angle causes the putter to strike the gate, giving you instant auditory and tactile feedback. This immediate correction trains the two most critical fundamentals of putting: a square face at impact and a repeatable stroke path.
Whether you favor a straight-back-and-through motion or a slight arc, gates force you to keep the putter head on the intended line, effectively eliminating pushes and pulls. Beginners can use them to learn putting basics, while experienced players refine their distance control and stroke consistency under pressure.
Types of Putting Gates
You’ll find several variations to match your practice style and budget. Basic models consist of two lightweight rods that you simply press into a putting mat or green. More advanced versions offer adjustable widths and built-in alignment guides, allowing you to tailor the gap to your putter’s exact dimensions. Prices for simple, effective gates typically range from $15 to $30, while premium adjustable systems cost $40 or more.
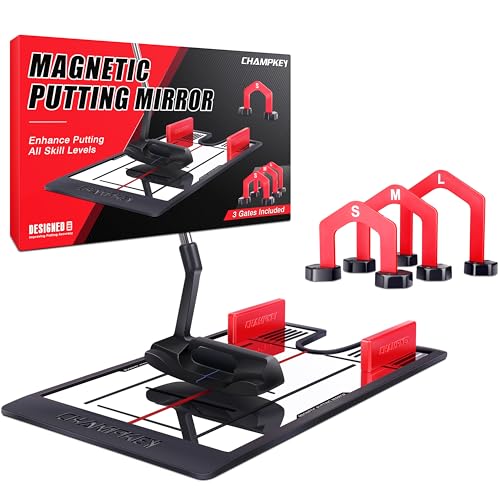
Some gates integrate seamlessly with putting mirrors, combining path feedback with eye-alignment cues. Others connect to alignment sticks or putting arcs for players who prefer a slightly arcing stroke. Always check that the gate accommodates your putter head width—most standard gates work with both blades and mallets, but if you use an oversized mallet putter, look for an adjustable model.
Benefits of Regular Putting Gate Drills
- Instant Feedback: The unmistakable “click” of a mishit immediately tells you when your stroke strays, reinforcing a pure, centered strike.
- Stroke Path Consistency: By forcing a narrow corridor, gates groove a repeatable in-to-square-to-in motion that holds up on the course.
- Alignment Discipline: Used together with alignment training, gates ensure your body, eyes, and putter face are all square to the target line.
- Pressure‑Proof Confidence: Knowing your stroke is mechanically sound reduces anxiety on short putts, a key element of mental game confidence.
- Portable and Affordable: Gates are among the most cost‑effective training aids you can own, fitting easily in a golf bag for use anywhere.
How to Use Putting Gates: Step‑by‑Step Drills
Start on a flat surface like a practice mat or a level section of a putting green and follow this progressive routine.
- Set Up the Gate: Place the gate 3–4 feet from the hole. Adjust the width so there is roughly ¼ inch of clearance on each side of your putter. This tight tolerance demands precision.
- Path Drill: Make 10 consecutive strokes without touching the gates. If you hit one, start the count over. This drill builds muscle memory for a perfectly straight path.
- Add Alignment: Position an alignment stick just outside the gate, parallel to your target line, and use it to check that your eyes and shoulders are square.
- Increase Distance: Once you’re flawless at 3 feet, move back to 6, 8, and then 10 feet. The gate forces you to maintain a smooth stroke without deceleration.
- Pressure Simulation: Set a goal—for example, 20 consecutive putts through the gate and into the hole. This injects game‑like pressure and sharpens focus techniques.
- Pre‑Shot Routine Integration: Practice your full pre‑shot routine before each stroke, visualizing the ball rolling through the gate and into the cup.
Choosing the Right Putting Gate for Your Game
Select a gate that matches your stroke type. If you use a straight‑back‑and‑through motion, a fixed narrow gate works perfectly. For players with a slight arc, consider an adjustable gate that can be angled to accommodate your natural path. Portability matters if you move between the practice green and your home—lightweight, collapsible models are ideal. For a complete transformation, pair your gate with a putter fitting session to ensure your putter’s length, lie angle, and loft are optimized for your stroke.
Integrating Putting Gates with Other Training Aids
Gates are most powerful when combined with complementary tools. Use a putting mirror to verify that your eyes are directly over the ball, and an putting arc if you naturally swing on a gentle curve. For green reading practice, grab a green reading book and practice different breaks while stroking through the gate. This multi‑sensory approach engrains a reliable stroke that holds up on any green.
Frequently Asked Questions
Can putting gates damage real greens? No—most gates are made with soft, rounded materials that won’t harm turf. Always press them in gently and remove them when you’re finished.
Do I need a specific putter style? Gates work with any standard blade or mallet putter. If you use an oversized mallet, simply look for a gate with a wider setting.
How often should I practice with gates? Just 10–15 minutes a few times a week can produce measurable improvement. Consistency trumps marathon sessions.
Are putting gates suitable for beginners? Absolutely. They teach proper fundamentals from the very first stroke and prevent bad habits from forming.