Mastering Green Reading: Pro Techniques to Sink More Putts
Reading greens is the difference between a three‑putt and a tap‑in par. Learn how to read break, grain, and speed like a tour pro.
Did You Know? Tour players average only 1.5 putts per hole, largely due to superior green reading skills. Sharpening your reads can save you 3‑5 strokes per round.
Why Green Reading Matters
Green reading is the art of predicting exactly how the ball will roll from your putter to the hole. It’s not just about seeing the break – it’s about understanding how slope, grain, and green speed work together to influence the ball’s path. Even a perfectly struck putt will miss if you’ve misread the line. That’s why dedicating time to putting tips that focus on reading greens is one of the quickest ways to lower your scores.
Many amateurs rely on guesswork or a quick glance from behind the ball. Tour professionals, however, walk the entire putt, feel the slope with their feet, and use structured systems like AimPoint. The good news? You don’t need to be a pro to adopt these techniques. With a little practice and the right training aids, you can transform your putting performance.
The Fundamentals: Slope, Grain, and Speed
1. Slope and Break
Slope is the most obvious factor. Water drains to the lowest point, and your ball will do the same. Always identify the high and low sides of the green relative to your line. A common rule of thumb: the putt breaks more than you think on fast greens and less on slow greens because speed alters the effective break. Using a putting alignment aid on the practice green helps you train your eyes to see the true break.
Look beyond the immediate line. The break often changes near the hole where the ball slows down. Walk around the hole and see the putt from the low side – this reveals the final break that isn’t visible from behind the ball.
2. The Effect of Grain
Grain refers to the direction the grass blades grow. On Bermuda grass greens, grain can significantly influence the roll. A putt going into the grain (the grass looks shiny) will be slower and break less; a putt going with the grain (dull appearance) will be faster and break more. On bentgrass greens, grain is less pronounced but still affects the ball in the late stages of the roll. Always check the cup edges – the side where the grass is slightly worn indicates the prevailing grain direction.
3. Speed Dictates the Line
There is no “perfect line” without considering speed. A faster putt takes a straighter line; a dying‑speed putt will borrow much more. Great green readers decide on a delivery speed first, then read the break accordingly. Developing distance control is essential because you can’t consistently sink putts if your speed varies wildly. Practice rolling balls to the fringe to calibrate your feel before each round.
Proven Green Reading Techniques
The Plumb‑Bob Method
Plumb‑bobbing uses your putter as a vertical reference to determine the slope. Hold the putter lightly between two fingers just in front of your dominant eye, aligning the shaft with the ball and the hole. The shaft should hang perfectly vertical. If the hole appears to the left of the shaft, the ground slopes left‑to‑right. This technique works best on putts with a single, consistent break and is still used by many professionals.
The AimPoint Express System
AimPoint Express is a scientific green‑reading method that relies on feeling the slope with your feet. Stand at the midpoint of the putt and assess the percentage of slope (1–5%). Then use your fingers to determine the precise aim point. It’s incredibly accurate once you calibrate your feel, and many top coaches recommend it. While it requires an initial lesson, you can practice the feel at home with a putting mat that allows you to create breaks.
Using Your Feet to Feel the Slope
Even without formal AimPoint training, you can improve your reads by walking the line. Stand with your feet close together and feel which foot bears more weight. The lower foot tells you the direction of the break. Combine this foot feel with a visual inspection from behind the hole. Over time, your body will learn to associate subtle pressure differences with the amount of break, making this one of the most natural and reliable techniques.
Common Green Reading Mistakes
- Reading only from behind the ball. Always view the putt from the low side and behind the hole to see the full picture.
- Ignoring the last three feet. The ball loses most of its speed near the hole; that’s where the biggest break occurs.
- Over‑reading grain. On bentgrass greens, grain rarely overpowers slope. Let gravity be your primary guide.
- Not factoring in wind. A strong crosswind can push the ball off line on longer putts, especially on exposed greens.
- Changing your mind over the ball. Commit to your read before you step in. Indecision kills putting confidence.
Training Drills to Sharpen Your Reads
Practice doesn’t make perfect – perfect practice does. Incorporate these drills into your routine:
- Gate Drill: Place two tees just wider than the ball at your aim point. If you can roll the ball through the gate consistently, your read was correct. This builds trust in your line. You can also use putting gates for instant feedback.
- Mirror Drill: A putting mirror not only helps your alignment but also trains your eyes to see the true break when you set up square to the intended line.
- Clock Drill: Place balls at 3, 6, 9, and 12 feet around a hole. Read each putt and attempt to make them consecutively. This teaches you to read different breaks from the same distance.
- Eyes‑Closed Putting: Read the putt, set up, close your eyes, and stroke. This forces you to rely on your read and feel rather than second‑guessing during the stroke.
Best Tools to Master Green Reading
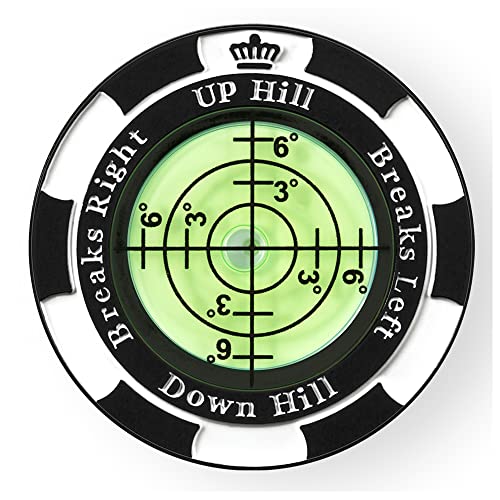
The right equipment accelerates your learning curve. A high‑quality digital level helps you understand slope percentages, while a putting arc trainer reinforces a consistent stroke path. For a complete home setup, a premium putting mat with break boards (starting around $80+) lets you practice reading and rolling putts daily. Combine these with focus techniques and a solid pre‑shot routine, and you’ll see noticeable improvement in weeks.