Best Launch Monitor for Golf Simulator: The Complete Buyer’s Guide
Everything you need to know to choose the perfect launch monitor for your indoor golf setup – from accuracy and data parameters to software compatibility and price.
COMPARE TOP MODELSWhy It Matters: A launch monitor is the heart of any golf simulator. It captures ball and club data with precision, turning your swing into a real‑time virtual shot. The right unit transforms practice into a game‑changing experience – but picking the wrong one can lead to frustration and wasted money.
Why a Launch Monitor Is the Engine of Your Simulator
Without a reliable launch monitor, even the best golf simulator setup is just a screen and a net. The monitor measures exactly how the club meets the ball – ball speed, launch angle, spin rate, spin axis, carry distance, and often club data like club speed, smash factor, and face angle. These numbers feed into simulation software, recreating your shot on famous courses or practice ranges. Whether you’re working on driver distance or dialing in your wedge game, the launch monitor provides the objective feedback that a net alone never can.
Modern units range from compact portable monitors that fit in your bag to professional‑grade ceiling mounts. Selecting one that matches your goals, space, and budget is the most important decision you’ll make for your indoor golf experience.
5 Critical Features to Look For in a Simulator Launch Monitor
Quick Navigation: Use these five pillars to compare any model side by side. We’ll also give you real‑world price examples to ground your search.
1. Accuracy & Technology Type
Launch monitors fall into two main categories: photometric (camera‑based) and radar‑based. Camera systems like SkyTrak+ ($2,495) or Uneekor EYE XO ($3,000) excel indoors because they directly capture ball images. Radar units such as the FlightScope Mevo+ ($2,000) are versatile outdoors but require more room indoors (ideally 8‑10 feet of ball flight). For a dedicated simulator where space is controlled, a photometric monitor often gives the most consistent spin readings – the holy grail of realistic simulation.
Always check that the device measures spin axis and total spin accurately; without these, shot shape (draw/fade) won’t display correctly. For a deep dive into technology differences, see our launch monitor comparison guide.
2. Data Parameters – What Do You Need?
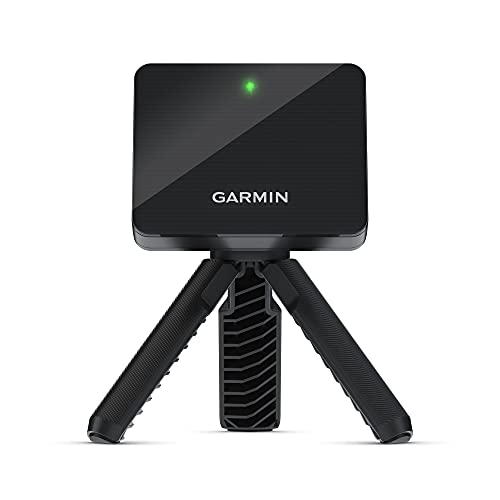
A basic unit like the Garmin Approach R10 ($600) gives you ball speed, launch angle, and estimated spin – great for fun and light practice. As you move up, you unlock club data (club path, face to path, angle of attack) and premium ball data like spin rate and spin axis. Ask yourself: do you want to work on swing fundamentals with club data, or just play simulated rounds? If you’re serious about improvement, look for a model that includes club data without requiring extra stickers or sensors.
3. Software & Simulation Compatibility
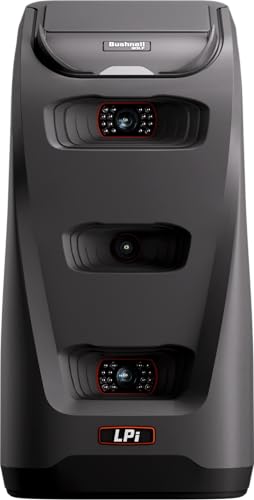
Not every monitor works with every software. Popular simulation platforms include E6 Connect, The Golf Club 2019, GSPro, and Awesome Golf. SkyTrak+ comes with its own range software and supports third‑party simulators. The Bushnell Launch Pro ($3,500) pairs seamlessly with Foresight’s FSX Play. Before buying, verify that your chosen launch monitor is officially supported by the simulator software you plan to use – otherwise you may face expensive workarounds or limited features.
4. Indoor vs Outdoor Use
If you plan to take your monitor to the driving range occasionally, a portable radar unit like the Rapsodo MLM2PRO ($700) shines outdoors. For a permanent indoor installation, a camera‑based ceiling mount such as the Uneekor EYE XO offers automatic calibration and zero movement between shots. Some units, like the FlightScope Mevo+, work well in both environments with proper setup. Decide upfront – a dedicated indoor monitor may lack the versatility of a dual‑purpose device.
5. Space Requirements & Portability
Radar monitors need depth behind the ball and flight distance; the Mevo+ recommends 8 feet of ball flight. Camera monitors sit beside or above the ball, saving depth but often requiring a specific height/angle. Measure your room before shopping. Also consider whether you’ll move the unit – a portable monitor like the Garmin R10 sets up in seconds, while a ceiling‑mounted Uneekor is a permanent fixture.
How to Pick the Right Launch Monitor for Your Simulator
Start by defining your budget, space, and primary goal (entertainment, serious practice, or both). For a fun family setup, a $600–$700 radar monitor provides plenty of excitement. If you want detailed club data and ultra‑accurate simulation, budget $2,000–$3,500 for a mid‑range model like the SkyTrak+ or Bushnell Launch Pro. Professional‑grade units such as the Foresight GC3 ($7,000) or GCQuad ($15,000) offer tour‑level precision but require a bigger investment.
Don’t forget the supporting gear: a quality hitting mat and an impact screen or practice net are just as important as the monitor itself. For step‑by‑step guidance on building the full enclosure, visit our simulator setup guide.
Setup Tips for Maximum Accuracy
- Positioning: Follow the manufacturer’s exact distance and height guidelines. Even a few inches off can cause spin misreads.
- Lighting: Photometric monitors need consistent, glare‑free lighting. Avoid direct sunlight or harsh overhead spots.
- Calibration: Many units require a quick calibration before each session – don’t skip it.
- Hitting Area: Use a level, stable mat. Wobbling or uneven lies will affect club data.
- Software Updates: Keep both the monitor firmware and simulation software current to access new features and bug fixes.
Common Mistakes to Avoid
- Ignoring spin accuracy: A monitor that estimates spin rather than measuring it will make your simulator feel unrealistic.
- Underestimating space: Radar units need room behind and in front. Measure twice.
- Forgetting about subscription fees: Some monitors (e.g., SkyTrak Game Improvement Plan, Bushnell Launch Pro gold subscription) require yearly fees to unlock full features. Factor these into your budget.
- Overlooking software compatibility: Confirm the monitor works with your preferred simulation software before purchase.
The best launch monitor for your golf simulator is the one that fits your space, delivers the data you’ll actually use, and matches your budget. For most home users, a $2,000–$3,000 camera‑based system offers the ideal blend of accuracy, ease of use, and software support.
Ready to see the top contenders? Below we’ve curated the most popular launch monitors based on performance and real user feedback. Click any product to check current pricing and dive deeper into your research.